

Planning a DIY Home Automation System
A DIY home automation system can make your home more comfortable, efficient, secure, and enjoyable, but the best results come from careful planning rather than buying random smart devices and hoping they work well together.
Home automation is not just about turning lights on with a phone or asking a speaker to play music. It is about designing a connected environment where devices respond intelligently to your daily routines, reduce repetitive tasks, help manage energy use, and give you better control over your home whether you are inside it or away.
A well-planned system can start small and grow over time, while a poorly planned one can become frustrating, unreliable, expensive, and difficult to maintain. Before installing smart switches, cameras, sensors, thermostats, locks, plugs, or hubs, it is worth thinking through your goals, your budget, your home’s layout, your technical comfort level, and the platforms you want to use.
The first step in planning a DIY home automation system is deciding what you actually want the system to accomplish. Many homeowners begin with a vague interest in making their house “smart,” but that can lead to unnecessary purchases and confusing setups. Instead, think in terms of practical problems and daily conveniences.
You might want lights that turn on automatically when you enter a hallway at night, a thermostat that saves energy when no one is home, a doorbell camera that lets you see visitors from your phone, or window sensors that alert you if a window is left open.
You may also want to automate routines, such as turning off all lights, locking doors, lowering the thermostat, and arming security sensors when you go to bed. By listing your goals clearly, you can choose devices that support those goals and avoid features that sound impressive but do not improve your daily life.
It helps to divide your goals into categories, such as lighting, climate control, security, entertainment, energy management, convenience, and accessibility. Lighting automation is often the easiest place to start because smart bulbs, switches, dimmers, and motion sensors are widely available and relatively simple to install.
Climate control can involve smart thermostats, temperature sensors, ceiling fan controls, and automated blinds. Security may include cameras, smart locks, contact sensors, glass-break sensors, sirens, and video doorbells. Energy management can include smart plugs, appliance monitoring, solar integration, and automated schedules.
Accessibility features might include voice control, automated doors, alerts, and routines designed for people with limited mobility. Once you understand your priorities, you can decide which features are essential now and which can be added later.
Budget planning is one of the most important parts of a DIY home automation project because costs can grow quickly. A single smart bulb or plug may be inexpensive, but a full-home system with switches, sensors, cameras, hubs, speakers, network upgrades, and backup power can become a significant investment.
Begin by setting a total budget for the first phase of your project rather than trying to automate everything at once. For example, you might decide to spend your initial budget on a reliable hub, several smart switches in key rooms, a smart thermostat, and a few security sensors. Later, you can add cameras, smart locks, outdoor lighting, and more advanced automations. A phased approach lets you test devices, learn what works best, and avoid buying too much equipment before you understand your needs.
When estimating costs, remember to include more than the device prices. Some systems require hubs or bridges, while others depend on cloud subscriptions for advanced features, video storage, security monitoring, or artificial intelligence alerts.
Smart cameras, in particular, can involve ongoing monthly fees if you want recorded video history. You may also need stronger Wi-Fi equipment, such as a mesh network, especially if you plan to connect many devices across a large home. For hardwired devices like smart switches, dimmers, thermostats, or smart doorbells, you may need basic electrical tools or professional help if you are not comfortable working with wiring.
Batteries for sensors and locks are another long-term cost, as are replacement devices when older models are discontinued. Planning for these costs from the beginning will help you create a system that is affordable to build and maintain.
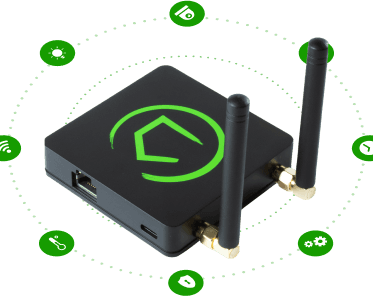
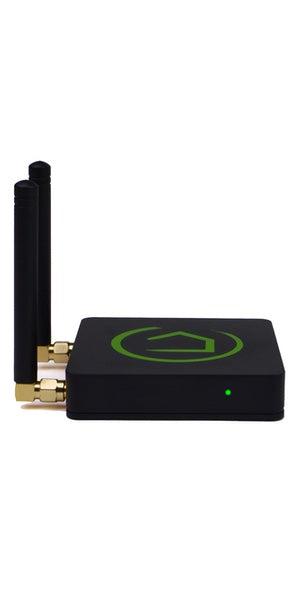
A home automation platform is the foundation that lets your devices communicate, respond to commands, and run automations. Popular consumer platforms include Apple Home, Google Home, Amazon Alexa, Samsung SmartThings, and more advanced local-control platforms such as Home Assistant or Hubitat.
Each platform has strengths and limitations, so your choice should depend on your household’s devices, privacy preferences, technical ability, and desired level of control. If your family already uses iPhones, Apple Home may feel natural and provide strong privacy features. If you rely heavily on Android phones and Google services,
Google Home may be convenient. If you use Echo speakers and Alexa voice control, Amazon’s ecosystem may be appealing. If you want deep customization, local processing, and independence from cloud services, Home Assistant may be the better long-term choice.
It is wise to avoid locking yourself too tightly into a single brand unless you are sure it will meet your needs for years. The smart home industry changes quickly, and companies sometimes discontinue products, change subscription plans, or reduce support for older devices. Choosing devices that support broad standards and multiple ecosystems gives you more flexibility. Matter, a newer smart home standard, was created to improve compatibility between major platforms and device makers.
Thread, Zigbee, Z-Wave, Wi-Fi, and Bluetooth are also communication technologies you may encounter. Rather than buying only the cheapest device, look for products with strong platform support, a good reputation, reliable firmware updates, and clear compatibility information. Your platform choice will affect every future purchase, so take time to research it carefully.
Smart home devices communicate in different ways, and understanding the basics can prevent many problems. Wi-Fi devices connect directly to your home network and are easy to set up, but too many Wi-Fi devices can crowd your network, especially if your router is older or poorly placed. Wi-Fi is common for cameras, smart speakers, plugs, appliances, and some lights. Zigbee and Z-Wave devices usually connect through a hub and form mesh networks, where devices can pass signals to one another.
These protocols are often used for sensors, switches, bulbs, locks, and smart plugs because they are low-power and reliable. Thread is another low-power mesh technology that is becoming more common, especially with Matter-compatible devices. Bluetooth is usually used for close-range control or setup, but it is less ideal as the main communication method for a whole-home system.
The best system often uses a mix of technologies, but the mix should be intentional. For example, you might use Wi-Fi for cameras and speakers because they need higher bandwidth, while using Zigbee, Z-Wave, or Thread for battery-powered sensors and switches. Mesh-based smart home devices can become more reliable as you add powered devices that act as repeaters, such as smart plugs or in-wall switches.
However, they still require thoughtful placement, especially in larger homes or houses with thick walls, metal structures, or multiple floors. Before purchasing devices, think about where they will be installed and whether the signal can reach the hub or router. If possible, read real-world reviews from people with similar homes. A device that works perfectly in a small apartment may struggle in a large house with detached garages, basements, or outdoor areas.
Your home network is the backbone of a modern DIY automation system, so it deserves attention before you add dozens of connected devices. Many smart home frustrations, such as delayed commands, offline cameras, missed notifications, and unreliable voice control, are actually network problems.
Start by evaluating your internet speed, router age, Wi-Fi coverage, and the number of devices already connected. If your router is several years old, located in a corner, or struggling with phones, laptops, televisions, and game consoles, it may not handle a growing smart home very well. A mesh Wi-Fi system can improve coverage in larger homes, while a wired Ethernet connection is ideal for stationary devices such as hubs, network video recorders, desktop computers, and media centers.
Security is also a major network consideration. Smart devices can create additional entry points into your home network, especially if they are poorly supported or use weak passwords. Use strong, unique passwords for your router, smart home accounts, and device apps. Enable two-factor authentication where available. Keep firmware updated on your router and smart devices. Some homeowners create a separate guest network or Internet of Things network for smart devices to reduce risk.
While this can improve security, it can also complicate communication between phones, hubs, and devices, so it must be configured thoughtfully. At minimum, avoid using unknown brands with questionable apps, and do not ignore update notifications. A smart home should make life easier, not expose your private data or weaken your network.
A practical way to design your system is to walk through your home room by room and write down what you want to automate in each space. In the entryway, you might want a smart lock, a door sensor, a video doorbell, and lights that turn on when the door opens after sunset. In the living room, you might want voice-controlled lighting, automated blinds, smart speakers, and a scene that dims lights when you watch a movie. In the kitchen, smart plugs could control under-cabinet lighting or small appliances, while leak sensors under the sink could alert you to water problems.
Bedrooms may benefit from gentle wake-up lighting, quiet nighttime pathways, temperature control, and simple bedside controls. Bathrooms can use humidity sensors to run exhaust fans automatically, while garages can include smart door controllers, motion lights, and open-door alerts.
Outdoor spaces should also be considered. Smart landscape lighting, motion-activated floodlights, outdoor cameras, weather sensors, irrigation controls, and gate sensors can all improve convenience and security. However, outdoor devices must be rated for weather exposure and placed within reliable signal range.
Power availability is another factor. Battery-powered cameras are easy to install but require charging and may not record continuously, while wired cameras are more dependable but more difficult to install. Solar accessories can help in sunny areas but may not be reliable in shaded locations or during winter. By planning room by room and noting power sources, Wi-Fi strength, mounting locations, and likely automations, you can create a complete picture of your needs before buying equipment.
Lighting is one of the most satisfying and useful areas of home automation because it affects comfort, safety, energy use, and atmosphere every day. You can automate lighting with smart bulbs, smart switches, smart dimmers, smart plugs, or a combination of these. Smart bulbs are easy to install and can offer color changes and tunable white light, but they need constant power.
If someone turns off the wall switch, the bulb may become unreachable. Smart switches and dimmers control the fixture directly and preserve normal wall control, making them better for many permanent installations. However, they may require neutral wires, correct load types, and careful installation. Before buying smart switches, remove the wall plate only if safe to do so and verify your wiring, or consult an electrician.
Good lighting automation is not just about remote control. It should respond to time, motion, occupancy, daylight, and household routines. Hallway lights can turn on dimly at night so people can move around without being blinded. Porch lights can turn on at sunset and off at sunrise. Closet lights can activate when doors open. Living room lamps can shift to warmer tones in the evening.
Security scenes can make the house look occupied while you are away. It is also important to design manual control into the system. Guests, children, and family members should still be able to use familiar switches or simple buttons without needing an app. The best lighting system feels natural, not complicated.
Security and safety are major reasons people invest in smart home technology, but these features must be planned carefully to avoid false alarms, privacy concerns, and gaps in coverage. Common security devices include door and window sensors, motion detectors, glass-break sensors, indoor and outdoor cameras, smart locks, video doorbells, sirens, and alarm keypads. Safety devices may include smoke detectors, carbon monoxide detectors, water leak sensors, freeze sensors, and smart shutoff valves.
Start by identifying the most vulnerable or important areas of your home, such as entry doors, ground-floor windows, basement access points, garages, utility rooms, and areas with plumbing. A few well-placed sensors can be more useful than many devices installed without a plan.
Cameras require special thought. They can be helpful for monitoring deliveries, visitors, driveways, and outdoor activity, but they also raise privacy and data concerns. Decide whether you want cloud storage, local storage, or both. Cloud storage is convenient but may require subscriptions and depends on the provider’s security policies.
Local storage gives you more control but may require technical setup and physical protection of the recorder. Avoid placing indoor cameras in private areas such as bedrooms and bathrooms, and make sure household members understand where cameras are located and when they record. Smart locks should be chosen for reliability, battery life, physical strength, and backup access. A lock that works with your phone is convenient, but you still need a plan for dead batteries, lost phones, guests, and emergencies.
A DIY home automation system can reduce energy waste if you plan climate and energy features intelligently. Smart thermostats are a common starting point because heating and cooling are major energy expenses. These thermostats can learn schedules, detect occupancy, adjust temperatures when you are away, and provide energy reports.
However, not every smart thermostat is compatible with every heating and cooling system, so check wiring, voltage, system type, and manufacturer requirements before purchasing. Additional temperature sensors can improve comfort in homes where one thermostat does not represent every room well. For example, a bedroom sensor can help maintain sleeping comfort at night, while the main thermostat can prioritize living areas during the day.
Beyond thermostats, smart plugs and energy monitors can help identify devices that consume power unnecessarily. Automations can turn off lights, fans, heaters, entertainment equipment, or office devices when rooms are empty. Smart blinds or shades can reduce heat gain in summer and help retain warmth in winter. Ceiling fans can be automated to support heating and cooling by circulating air.
Irrigation controllers can adjust watering schedules based on weather, reducing water waste. The key is to balance savings with comfort and practicality. An overly aggressive energy-saving routine that turns off devices too often will annoy people and may be disabled. Start with simple automations that save energy without requiring lifestyle changes.
Automations are the heart of a smart home. They allow devices to work together based on triggers, conditions, and actions. A trigger might be motion detected, a door opening, sunrise, sunset, a specific time, a phone arriving home, or a sensor reaching a temperature threshold. Conditions refine the automation, such as only running after dark, only if nobody is home, or only on weekdays.
Actions are what the system does, such as turning on lights, locking doors, sending notifications, adjusting the thermostat, or playing an announcement. Scenes are groups of device settings activated together, such as “Good Morning,” “Movie Night,” “Away,” or “Bedtime.” Planning these in advance helps your system feel organized and purposeful.
Start with a few high-value automations instead of creating dozens immediately. Good early examples include turning on entry lights when you unlock the door after sunset, shutting off all downstairs lights at bedtime, receiving an alert when the garage door is left open, and lowering the thermostat when everyone leaves home. Test each automation for several days and adjust it based on real behavior. Consider edge cases, such as guests staying over, pets triggering motion sensors, someone working from home, internet outages, or family members without smartphones. An automation that seems clever in theory may be annoying if it runs at the wrong time. The goal is to make the home feel helpful and predictable, not mysterious or intrusive.
Voice assistants can make a DIY home automation system easier to use, especially for lighting, music, climate control, timers, and quick routines. Smart speakers and displays from major platforms can act as convenient control points throughout the home. However, voice control should not be the only method of control.
Voice commands can fail because of background noise, internet issues, misunderstood names, or privacy settings. They can also be awkward for guests or inconvenient late at night. A strong system includes multiple control options: physical switches, wall keypads, wireless buttons, phone apps, tablets, voice assistants, and automated routines.
Naming conventions are important for voice control. Use simple, natural names for rooms and devices, such as “kitchen lights,” “bedroom lamp,” or “front door lock.” Avoid duplicate names or overly complex labels. Group devices by room so you can say commands like “turn off the living room lights” without naming each light individually.
For manual controls, think about what people expect when they enter a room. Wall switches should still work intuitively. If you use smart bulbs in lamps, consider smart buttons or remotes so people do not unplug them or turn off their power. The easier your system is for everyone to use, the more successful it will be.
Privacy should be part of your planning from the beginning, not an afterthought. Smart home devices can collect data about your habits, presence, voice commands, video footage, energy use, and daily routines. Before buying a device, review what data it collects, whether it requires a cloud account, whether it supports local control, and how long the manufacturer supports updates.
Devices from reputable brands with clear privacy policies are generally safer than unknown low-cost products with limited documentation. If privacy is a major concern, choose platforms and devices that support local processing, local video storage, and limited cloud dependence.
Be especially cautious with microphones, cameras, locks, and security devices. Use two-factor authentication on accounts, limit account sharing, and remove access for people who no longer need it. If you rent your home or host guests, be transparent about cameras and smart monitoring devices.
Keep a record of installed devices, their apps, account credentials, and reset procedures. This record is useful for maintenance, troubleshooting, resale, or emergencies. Smart home convenience should never come at the cost of unnecessary surveillance or poor security practices.
DIY installation can be rewarding, but safety matters. Battery-powered sensors, smart plugs, bulbs, speakers, and cameras are usually straightforward. Hardwired devices such as switches, dimmers, thermostats, doorbells, ceiling fan controllers, and outdoor fixtures require more caution.
Always turn off power at the breaker before working on electrical wiring, verify power is off with a tester, and follow local electrical codes. If you are uncertain about wiring, hire a licensed electrician. Some smart switches require neutral wires, some dimmers are not compatible with certain LED fixtures, and some thermostats need a common wire for stable power. Guessing can damage equipment or create hazards.
Plan mounting locations before drilling holes or applying adhesive. Sensors should be placed where they detect useful activity without causing false triggers. Motion sensors should not point directly at heating vents, sunny windows, or areas where pets frequently move unless they are designed for that.
Leak sensors should sit near water heaters, washing machines, dishwashers, sinks, toilets, and sump pumps. Cameras should have clear views without violating privacy. Labeling devices during installation can save time later, especially when adding many sensors or switches. A careful installation process leads to a cleaner, safer, more reliable system.
After installation, testing is essential. Confirm that each device responds from the app, physical controls, voice commands, and automations. Test sensors by opening doors, walking through motion zones, creating safe test conditions for leak alerts if possible, and checking notification delivery.
Test automations at the times and conditions they are meant to run. If a routine is supposed to activate after sunset, verify it after sunset rather than assuming it works. Check that family members can use the system comfortably and that manual controls still make sense. Early testing prevents small problems from becoming daily frustrations.
Maintenance is an ongoing part of home automation. Batteries need replacement, firmware needs updates, automations need adjustment, and devices may occasionally lose connection. Create a simple maintenance schedule to check battery levels, update apps, review security settings, clean camera lenses, and confirm critical alerts.
Keep spare batteries for sensors and locks. If your system uses a hub, consider connecting it and your router to a battery backup so essential automations and alerts continue during short power outages. Good maintenance keeps your system dependable and extends its usefulness.
A smart home should be designed to grow. Even if you begin with one room or one category, choose a platform and device strategy that can support future additions. Think about whether you may later want whole-home lighting control, security monitoring, smart irrigation, energy monitoring, solar integration, electric vehicle charging, home theater automation, or advanced local control.
Leave room in your budget and network capacity for expansion. Avoid buying devices that solve only one immediate problem but cannot integrate with anything else. A cheaper device may become expensive if you replace it later because it does not work with your chosen platform.
Document your system as it grows. Keep a list of device names, locations, model numbers, communication protocols, batteries, purchase dates, warranty information, and account connections. This may seem unnecessary for a small setup, but it becomes valuable once you have dozens of devices. Documentation also helps if you move, sell the house, reset a hub, or troubleshoot a failure. A thoughtful expansion plan keeps your system organized instead of turning it into a confusing collection of disconnected gadgets.
Planning a DIY home automation system is about creating a reliable, secure, and useful environment that fits your home and lifestyle. The best approach is to define your goals, choose a platform carefully, understand communication options, strengthen your network, plan room by room, and start with practical automations that solve real problems.
Lighting, climate control, energy management, and convenience features can all work together when they are chosen with compatibility and usability in mind. At the same time, privacy, safety, manual control, and long-term maintenance should remain central to every decision.
A successful smart home does not need to be built all at once. In fact, starting small is often the smartest strategy. Begin with a few dependable devices, learn how your platform works, test automations, and expand gradually.
Over time, your DIY home automation system can become a seamless part of daily life, quietly handling routine tasks, improving comfort, increasing awareness, and helping your home respond intelligently to the way you live. With careful planning, patience, and a focus on real needs rather than novelty, you can build a smart home that feels less like a collection of gadgets and more like a home that truly works for you.

March 21, 2023
March 21, 2023
March 21, 2023